Introduction
Due to last COVID-19 situation I have started to hang out with my friends online more than ever. As we are mostly used to communicate via TeamSpeak 3 servers to play games we needed to get one just for us. If it comes to renting one, prices are various, but they all have one common thing - monthly payments. Since I'm a cloud guy, I am expecting to have a pay-as-you-go experience, so I didn't want to commit to a monthly payments, since I am not using TeamSpeak server 24/7.
TeamSpeak 3 server in a container?
I have wondered if there are any docker images with TeamSpeak 3 server available in docker hub and of course... there is one! Having this I could set up a TeamSpeak server in just a couple of minutes anywhere.
Azure Container Instances to the rescue!
Since I didn't want to host my server locally and to pay for it when I'm not really using it (so VM would not be a good fit in here), plus I wanted to use docker image to setup it fast, I have decided to use Azure Container Instances. It is a serverless approach to conainers in the cloud, so we pay only for the time we are running our service.
But how?
Using ARM Template
If you want to use ARM Template, you probably don't need much explanation, so here is the button to simply deploy it to your subscription from my repository:
All the parameters are described with metadata, so you should have no problem with using it, even if you are a beginner, as it will be visible in Azure Portal during deployment setup.
Using Azure Portal from scratch
- Go to Azure Portal.
- Click on
create a resource. - Search for
container instancesand select it.
- Hit
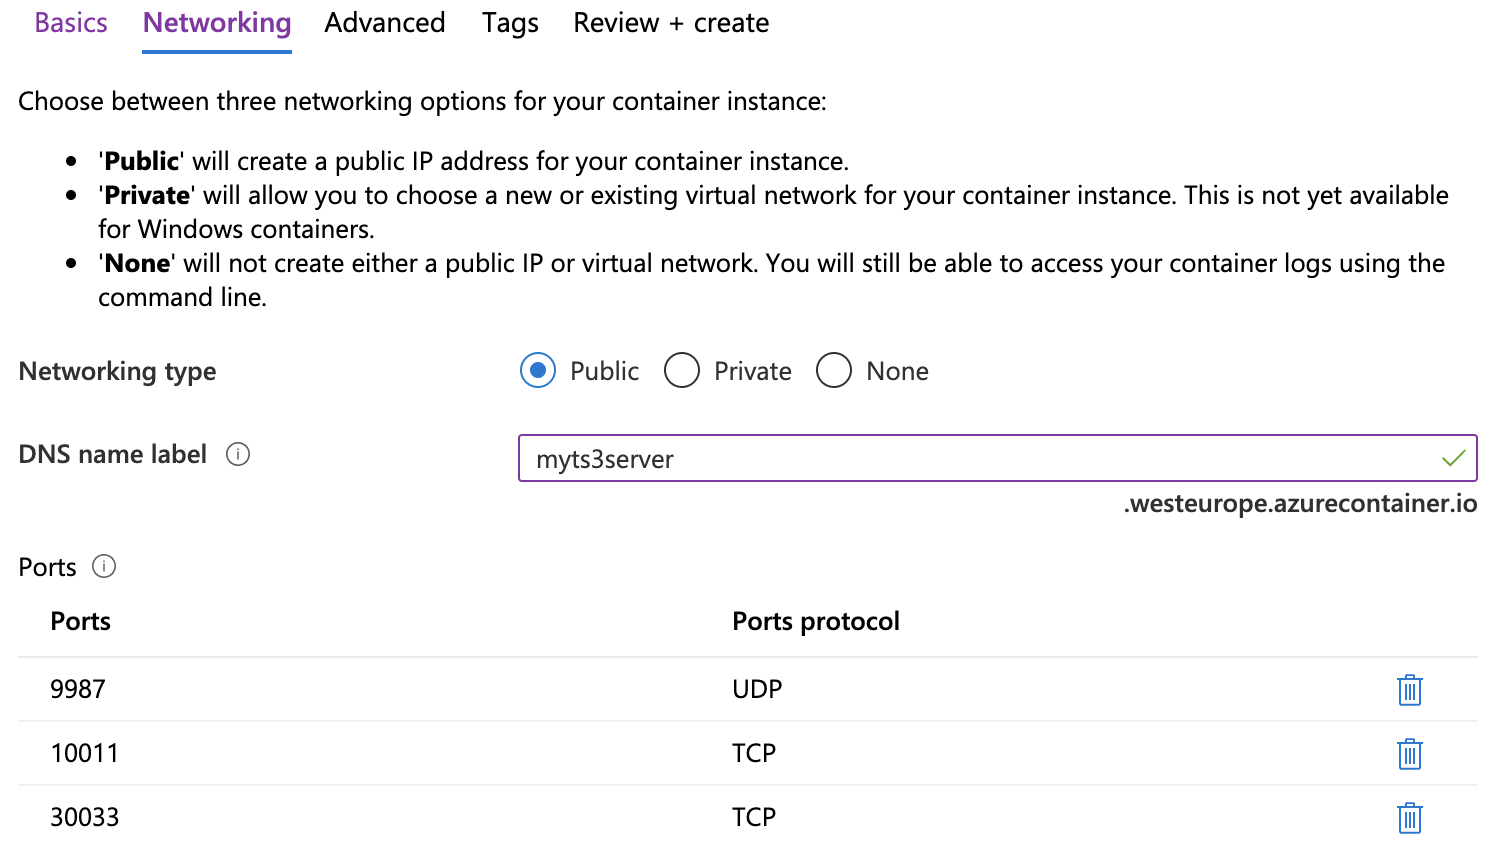
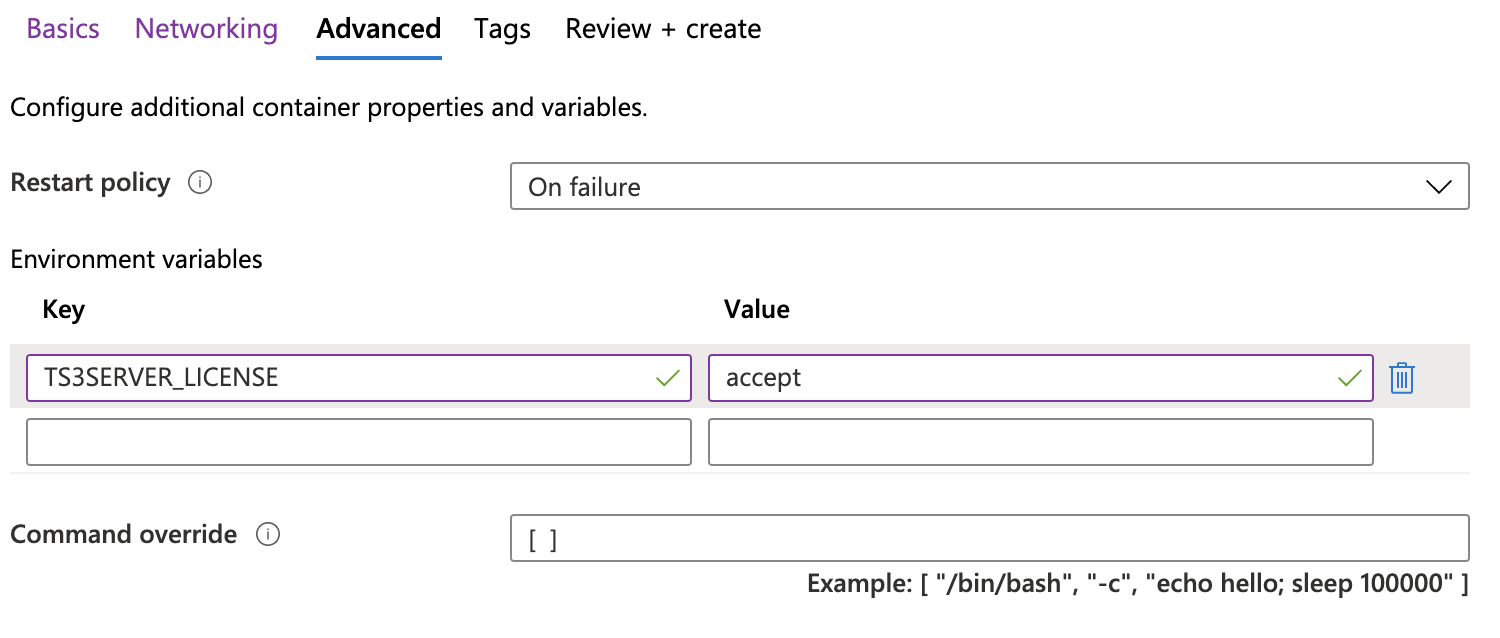
createbutton. - Go through resource creation wizard and follow screenshots below:

- Click
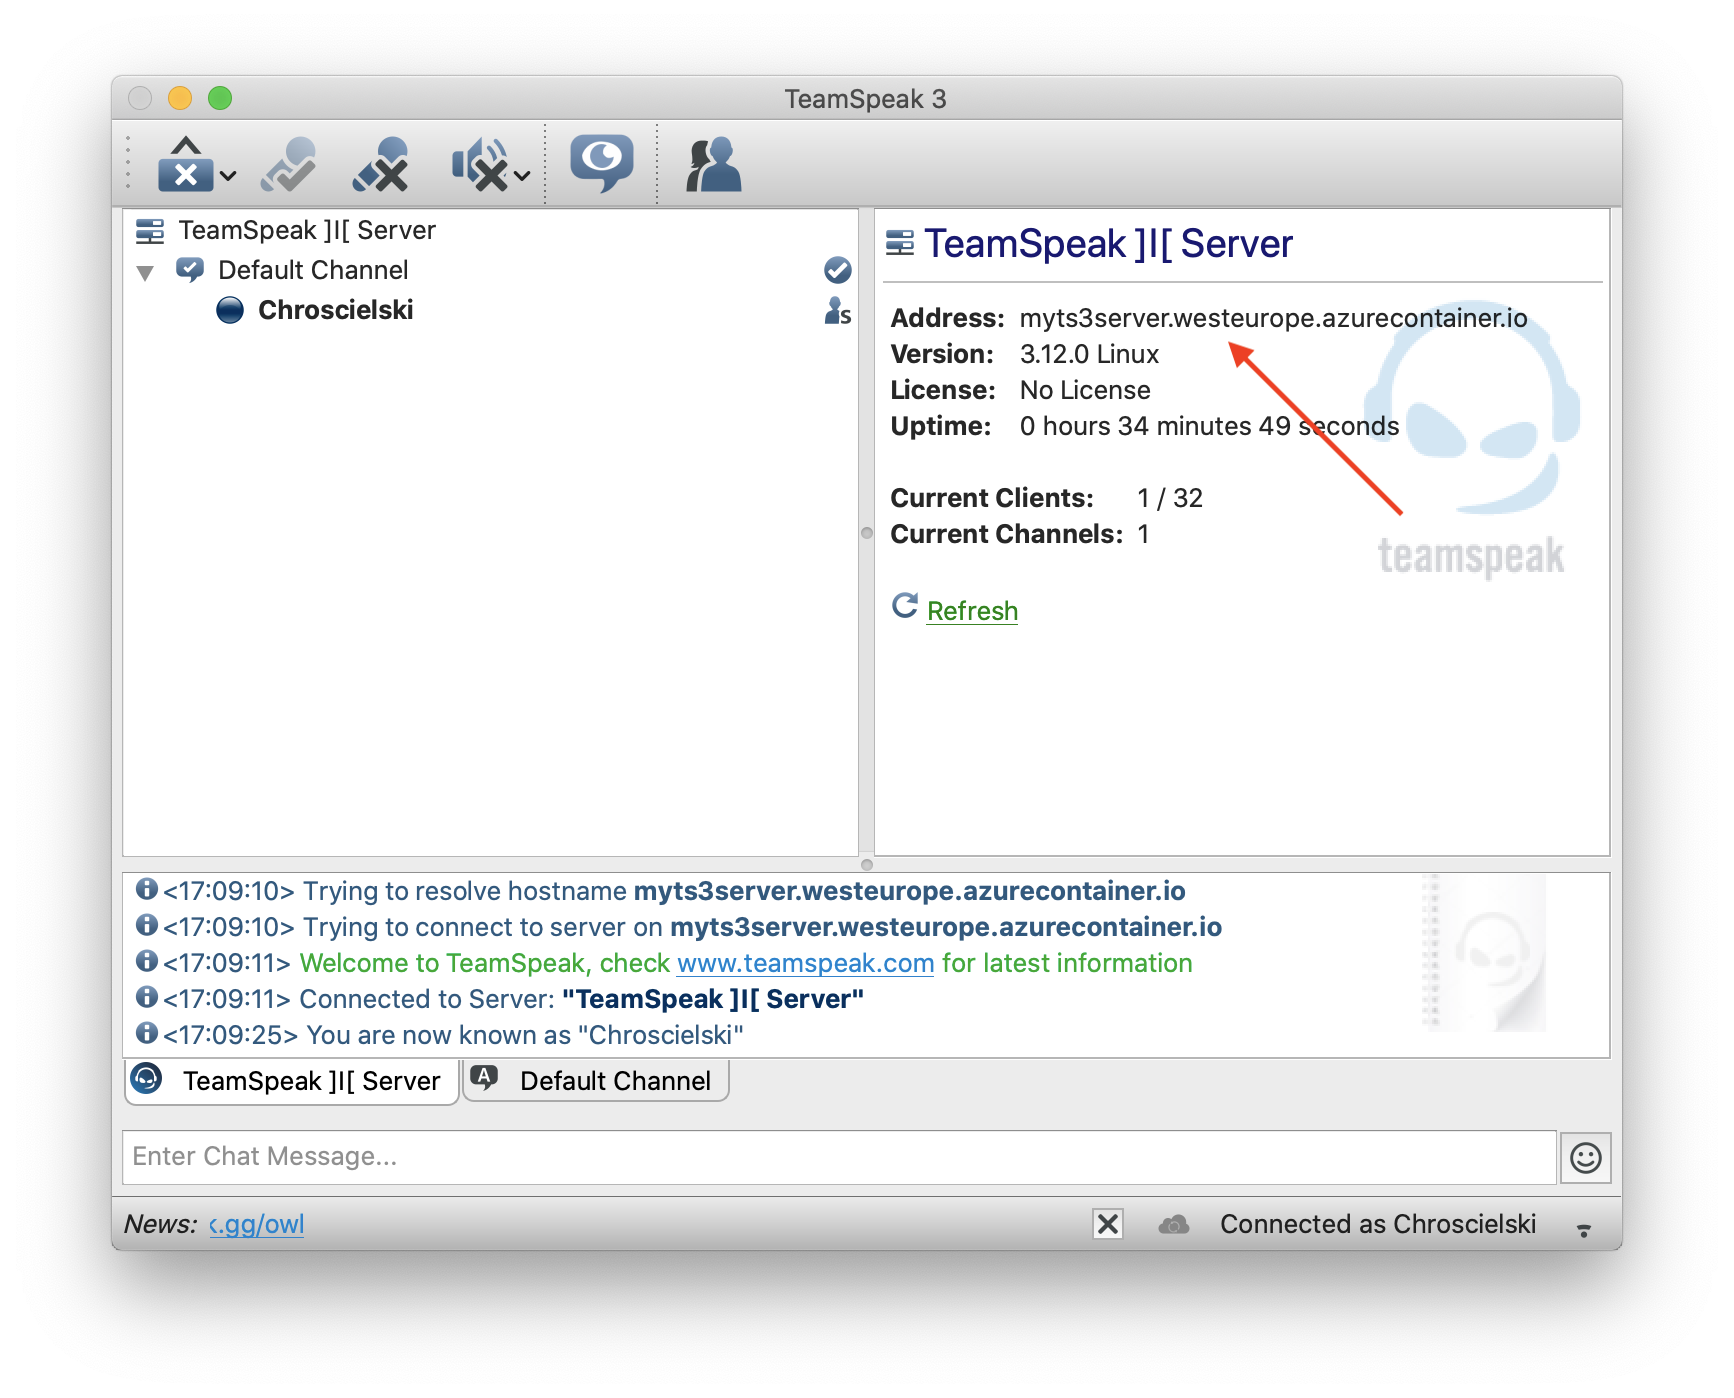
createbutton as a last step of the wizard, wait a while to deploy the resource and... vio'la! Your TeamSpeak 3 server should be now up and running.
Server management
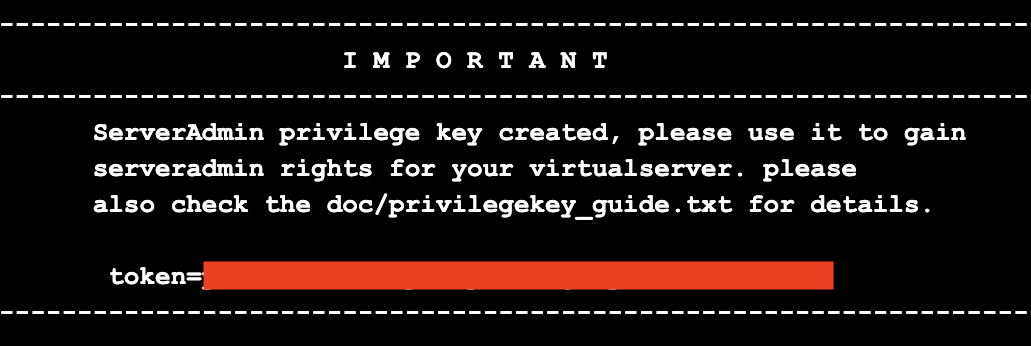
If you want to administrate your TeamSpeak 3 server as well, you have to use a token (which is labeled as privilege key in the client) when connecting to it. To obtain the token you have to:
1. Go to Azure Portal and select your resource.
2. Select proper container with your TeamSpeak 3 server running inside.
3. Selet Logs tab.

4. Find the token in logs. The value of it is the one you have to use as your passphrase to get administrator rights on the server.
Summary
This way you can set up many different services you are using only once a while and which would require a dedicated VM or some other hosting option. If running all the time, it will be much more expensive than a dedicated hosting. However if our intent is to use it for in example 3 hours per month should be a cost effective solution. If you have some your gaming time planned ahead, you may also think about starting and stopping container automatically with Azure Functions.
To sum it up, Azure Container Instances main benefits are:
- Simplicity (no need to worry about Virtual Machine or some other infra-stuff),
- Speed (just couple of az commands or clicks in the portal),
- Pay-as-you-go approach.
Got an idea on what else could be hosted that way? What are you using Container Instances for? Leave a comment below, maybe it will be useful for others as well.
Follow up
I have created an article on the same topic, but with use of Azure Storage Files, to keep sessions between server runs. You can check it here.


Michael Kleinpaste
I like this idea. Does it only run when the TS3 clients are connected or do you have to turn it on/off manually?
Dawid Chróścielski
In my scenario I had to turn it on and off manually (was enough for me at a time being), but if you would prefer to schedule it for let’s say evenings when you play with your friends, you can easily automate that with Azure Functions or Logic App 🙂
Leon
Thanks for your guide! Have you tried mounting azure storage such that the server will keeps its configuration across restarts? I have been fighting this for a couple of hours now…
Dawid Chróścielski
Hi! I have tried it myself and it seems like it is possible, but requires some tricky preparation. Here’s how to achieve that 🙂
Thomas
Just want to say thank you. Setting up ACI and the Container worked very well with the ARM template. Next step is starting and stopping with a Azure function via http request.
Thank you and best,
Thomas
Dawid Chróścielski
Thanks for the comment! I’m glad it helped! 🙂